


How to Remove Popcorn Ceilings
If you're a homeowner in Sacramento looking to revitalize your living space, one of the most transformative projects you can undertake is removing that outdated popcorn ceiling. At HouseIdea, we specialize in home improvement services in Sacramento and have helped countless homeowners modernize their homes. In this comprehensive guide, we'll walk you through the process of removing popcorn ceilings, step by step.
Why Consider Removing Popcorn Ceilings?
Popcorn ceilings, popular in the mid-20th century, have fallen out of favor due to their outdated appearance and the accumulation of dust and cobwebs in their nooks and crannies. If you're looking to breathe new life into your home, consider these compelling reasons to bid farewell to popcorn ceilings:
- Modernizing the Space: Popcorn ceilings can make your home feel dated. Removing them instantly modernizes the room, giving it a fresh and updated look.
- Enhancing Aesthetics: Smooth ceilings provide a clean, sleek backdrop for your decor. Without the bumpy texture, your space will feel more cohesive and visually appealing.
- Reducing Dust Accumulation: The texture of popcorn ceilings traps dust and makes cleaning a challenge. Removing them can help create a cleaner and healthier environment.
Understanding Popcorn Ceiling Material
Popcorn ceilings were traditionally made using a mixture of Styrofoam or paper-based materials. In some older homes, however, popcorn ceilings might contain asbestos, a hazardous material. It's crucial to understand the composition of your ceiling before proceeding with removal, especially in older homes.
Asbestos, once commonly used for its fire-resistant properties, poses serious health risks if disturbed. To ensure your safety, it's vital to test for asbestos before starting the removal process. At HouseIdea, we prioritize safety, and our experts can help you determine whether asbestos is present in your popcorn ceiling.
Safety Precautions and Preparations
Before you embark on the popcorn ceiling removal journey, it's crucial to take the following safety precautions:
- Protective Clothing: Wear suitable protective clothing, including coveralls, gloves, masks, and eyewear, to shield yourself from potential hazards.
- Seal Off the Work Area: Use plastic sheeting to seal off the work area from the rest of the house. This prevents debris and dust from spreading.
- Proper Ventilation: Ensure the area is well-ventilated by using fans and open windows. Proper ventilation helps in minimizing exposure to dust and potential contaminants.
Step-by-Step Guide to Removing Popcorn Ceilings
Preparation
Before you start, preparation is key:
- Cover your furniture and floors with plastic sheeting to prevent them from getting damaged or dirty.
- Remove light fixtures and ceiling fans to create a clear workspace.
- Apply water to a small section of the ceiling using a spray bottle. This will help soften the texture and make it easier to scrape off.
Dealing with Asbestos Contamination
If your popcorn ceiling contains asbestos, it's essential to address it with caution:
Risks of Asbestos: Asbestos fibers are hazardous when inhaled and can lead to severe health issues, including lung diseases and cancer. Professional testing is crucial to determine the presence of asbestos.
If asbestos is detected, it's highly recommended to seek professional assistance for asbestos removal. At HouseIdea, we prioritize your safety and can guide you through the process of safely dealing with asbestos contamination.
Benefits of Professional Popcorn Ceiling Removal
While DIY popcorn ceiling removal is possible, there are distinct advantages to hiring professionals:
- Expertise: Professionals have the experience and skills to safely and efficiently remove popcorn ceilings.
- Minimized Risk: Professionals are trained to handle hazardous materials like asbestos, reducing the risk to you and your family.
- Quality Results: Professional removal ensures a smooth and flawless finish, ready for painting or any other desired updates.
At HouseIdea, we have a proven track record of providing top-notch popcorn ceiling removal services, ensuring your home improvement project is a success.
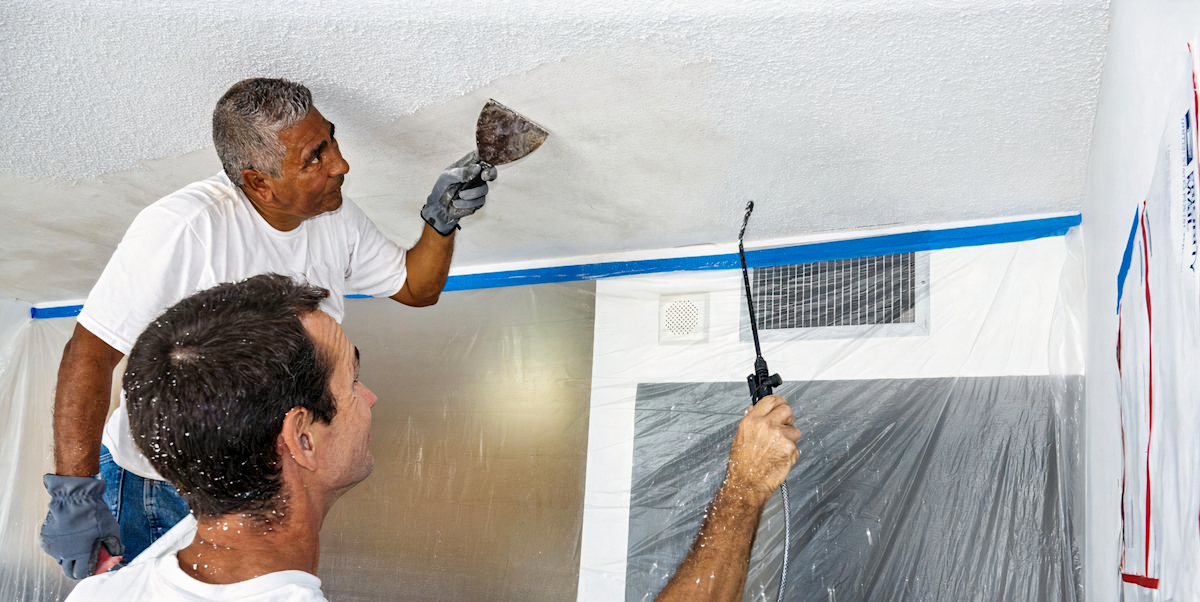
Scraping the Popcorn Texture
Now comes the main task of removing the popcorn texture from your ceiling. This step requires careful attention and precision to ensure that the underlying ceiling remains intact:
Using a wide putty knife or scraper, gently insert the tool at a low angle under the texture. Slowly and methodically, scrape the texture off the ceiling surface. Apply consistent but gentle pressure to avoid damaging the ceiling underneath.
It's important to work in small sections, typically no larger than a few square feet at a time. By doing so, you can maintain better control over the scraping process and minimize the risk of unintentional damage to the ceiling.
Wet Scrape Method
The wet scrape method is a technique that can greatly reduce the amount of dust produced during the popcorn ceiling removal process. This is especially beneficial when dealing with ceilings that might contain asbestos:
Before you begin scraping, dampen the ceiling with a spray bottle filled with water. By lightly misting the textured surface, you'll effectively soften the texture, making it easier to remove. The moisture also helps in minimizing the release of dust particles into the air, which is crucial for your safety and the safety of your family.
Keep in mind that this method is particularly useful when you suspect the presence of asbestos. By dampening the texture, you can significantly reduce the risk of asbestos fibers becoming airborne.
Cleaning Up
Once the scraping is complete, thorough cleaning up is an essential step to ensure your space is ready for further improvements:
Dispose of the removed texture according to your local regulations. Some areas consider popcorn texture removal waste as hazardous, so make sure to follow proper disposal guidelines to protect the environment and your community.
Next, it's time to clean the entire area where the popcorn ceiling was removed. This includes not only the ceiling itself but also walls, floors, and any nearby surfaces. Dust and residue from the removal process can settle throughout the room, so a thorough cleanup will help create a clean slate for your next steps.
Repair and Sanding
After successfully removing the popcorn texture, it's common to find minor imperfections on the ceiling's surface. Here's how to address them:
If you come across any damage or imperfections on the ceiling, whether due to the scraping process or pre-existing issues, it's important to repair them before proceeding. Use a high-quality joint compound or plaster to fill in cracks, holes, or other blemishes. Smooth the compound evenly and allow it to dry completely.
Once the repairs are dry, lightly sand the surface using a fine-grit sandpaper. Sanding creates a smooth and even finish, preparing the ceiling for the next phase of your project.
Painting the Ceiling
The final step in your popcorn ceiling removal journey is to give your newly scraped ceiling a fresh and vibrant look with a fresh coat of paint:
Prime the ceiling with a high-quality primer specifically designed for ceilings. Priming creates an even and consistent surface for the paint to adhere to, ensuring a flawless finish. Allow the primer to dry according to the manufacturer's instructions.
Now comes the fun part: choosing a paint color that complements your room's decor and style. Whether you opt for a classic white or a bold accent color, make sure to select a paint that resonates with your vision for the space.
Apply the paint evenly using a high-quality roller or brush. Work carefully and patiently to achieve a smooth and professional-looking finish. Once the paint is dry, step back and admire your transformed space.
At HouseIdea, we're proud to offer expert residential interior painting services that can truly elevate the appearance of your room. Our skilled painters are experienced in creating stunning, long-lasting finishes that enhance the overall aesthetic of your home.
By following these steps and guidelines, you can confidently remove popcorn ceilings from your Sacramento home and create a fresh canvas for your interior design aspirations.
Conclusion
Removing popcorn ceilings is a rewarding home improvement project that can instantly modernize your space. By following safety precautions, understanding the materials involved, and considering professional assistance, you can achieve impressive results. At HouseIdea, we're here to help you transform your Sacramento home with our expertise in popcorn ceiling removal and residential interior painting. Prioritizing safety and quality, we're your partners in creating a space you'll love for years to come.
Tags: How to Remove Popcorn Ceilings,


